“How to burn MKV to Blu-ray on Mac computer? What is the best software to burn MKV to Blu-ray on Mac?” Such questions might be very common among worldwide movie lovers who prefer to burn Blu-ray discs themselves. Actually, it would not be difficult for people to convert and burn MKV to Blu-ray or DVD discs on Windows computer as there are so many top or best Blu-ray burners for Windows. But for Mac users, there are quite fewer Blu-ray burners for Mac. In this guide, we would like to recommend you different Blu-ray burners for Mac users to burn MKV to Blu-ray on Mac computer easily.
OutlineCLOSE
Part 1: What Do You Need to Prepare to Burn MKV to Blu-ray?
Firstly, let’s briefly talk about what you need to prepare for burning MKV to Blu-ray on Mac computer. We have listed them below for you:
Notes:
- Blu-ray writer hardware: A Blu-ray drive that could let you insert Blu-ray disc and connect Blu-ray disc to your computer.
- Blu-ray burning software for Mac: This helps you create playable Blu-ray disc on Mac computer. Here we have shared 3 different Blu-ray burners for Mac to help you burn MKV to Blu-ray on Mac in the below contents.
- Blank Blu-ray disc: You need to prepare a blank writable Blu-ray (BD50 or BD25) disc or rewritable Blu-ray disc so as to create Blu-ray disc from MKV files on Mac computer.
- Enough storage space: Make sure your computer hard drive has enough storage space to handle the MKV to Blu-ray burning on Mac.
- Source MKV files: Definitely you need to prepare source MKV files for burning to Blu-ray disc on Mac computer.
- Additionally, you could even prepare additional codec encoder tools for burning specific audio or video files to Blu-ray disc on Mac. As for MKV to Blu-ray burning on Mac, generally speaking there is no need for this.
Part 2: How to Burn MKV to Blu-ray or ISO Image on Mac with Leawo Blu-ray Creator?
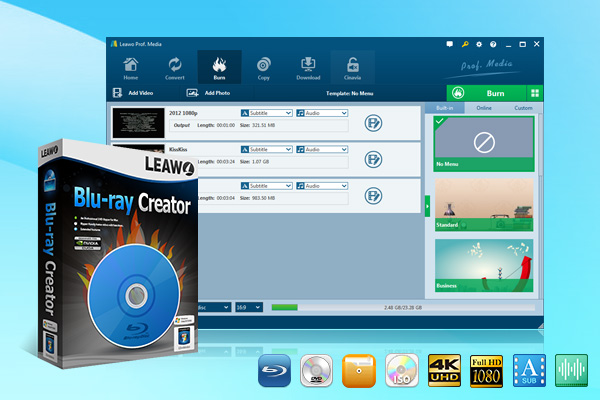
Leawo Blu-ray Creator for Mac is aiming to provide Mac users the best video to Blu-ray/DVD burning experience on Mac computers. Being a professional Mac Blu-ray burner, Leawo Blu-ray Creator for Mac could help Mac users easily convert and burn videos in various formats like MKV, MP4, AVI, FLV, etc. to Blu-ray/DVD discs, folders, or ISO Image file on Mac computer. Acting as MKV to Blu-ray burner for Mac, Leawo Blu-ray Creator for Mac could convert and burn MKV to Blu-ray on Mac while allow you to select subtitles and audio tracks, add preset disc menu or even customize disc menu, edit source MKV files like applying 3D effect and adding image or text watermark, etc.
The below guide would show you how to burn MKV file to Blu-ray disc on Mac with Leawo Blu-ray Creator for Mac. Firstly, download and install Leawo Blu-ray Creator for Mac on your MacBook or iMac. Meanwhile, to burn MKV file to Blu-ray disc on Mac, you need to insert blank writable Blu-ray disc into the Blu-ray drive that is connected with your Mac computer.

-
Leawo Blu-ray Creator
– Burn videos and photos to Blu-ray/DVD in 180+ formats.
– Burn multiple media files to one Blu-ray/DVD file in batch with 100% quality.
– Provide an internal video editor for personalized Blu-ray/DVD content.
– Offer 40+ selectable disc menu templates.
Step 1: Add source MKV files
Kick off Leawo Prof. Media and then click the Blu-ray Creator module on the home interface. Then, you will be led to the “Burn” tab, where you need to click the “Add Video” button. On the drop-down menu, choose to “Add Video” or “Add Video Folder” option to load source MKV files from your Mac computer.
Step 2: Set Blu-ray output
After loading source MKV files, you could select subtitles and audio tracks for burning. At the bottom left corner, you need to choose output Blu-ray disc type (BD25 or BD50), bit rate (Fit to disc) and aspect ratio (16:9).
Step 3: Add disc menu or customize disc menu
On the right sidebar, you could select a preset disc menu template in different themes for adding to output Blu-ray. By clicking the middle of it, you could preview the disc menu. On the disc menu preview panel, you could click the pencil icon to enter the disc menu editing panel, where you could change background image/video/music, adjust title position and content, set text color/size, etc. You could save the changes for future use.
Step 4: More burning settings
Then, after setting disc menu, click the green “Burn” button to call out the burning settings panel. You need to specify “Burn to”, “Disc Label” and “Save to” options. Under the “Burn to” option, you need to choose burn to Folder, ISO File or Disc. Since you want to burn MKV files to Blu-ray disc on Mac, choose at least your Blu-ray drive that has blank Blu-ray disc inserted as Burn to target here.
Step 5: Start burning MKV to Blu-ray on Mac
Finally, click the “Burn” button at the bottom to start to burn MKV to Blu-ray on Mac. Leawo Blu-ray Creator for Mac would then start burning MKV file to Blu-ray disc on Mac immediately. You could then view the entire burning process.
Leawo Blu-ray Creator for Mac allows you to freely create chapters for burning MKV to Blu-ray on Mac. You could manually create chapters or let Leawo Blu-ray Creator insert chapters automatically by using the internal video editor, which also lets you trim video length, crop video size, apply 3D effect and image/text watermark, etc.
Part 3: How to Burn MKV to Blu-ray on Mac with Express Burn?
Another MKV to Blu-ray burner for Mac is Express Burn Plus. Express Burn is a professional and multifunctional burner software tool that could help you create both data and playable Blu-ray/DVD/CD disc. Acting as MKV to Blu-ray burner for Mac, Express Burn enables you to convert and burn MKV to Blu-ray on Mac, with disc menu editable.
You could follow the below guide to learn how to burn MKV to Blu-ray on Mac with Express Burn:
Step 1: Download and install Express Burn on your Mac computer.
Step 2: Get source MKV files ready, and insert a blank writable Blu-ray disc into the Blu-ray drive that’s connected to Mac computer.
Step 3: Kick off Express Burn Plus. On the popup “Select a New Disc to Burn” interface, choose to create Video Blu-ray (BD) and then give output Blu-ray disc a name in the “Name of the Disc” box. After that, click the “Create” button. If the “Select a New Disc to Burn” interface doesn’t pop up, click the “New Disc” option.
Step 4: Click the “Add File(s)” button to browse and load source MKV files to Express Burn Plus from Mac computer.
Step 5: After loading source MKV file, if you want to add disc menu, click the “Create Menu” button, and then design disc menu on the popup “Disc Menu Creator” window.
Step 6: You could click the Video Settings, Manage Chapters options to set video parameters and manage chapters for burning to Blu-ray disc.
Step 7: After that, click the “Burn Video Blu-ray” button at the bottom right corner to choose Blu-ray burner and start burning MKV file to Blu-ray disc on Mac.
By following the above steps, you could easily burn MKV to Blu-ray on Mac computer. The below are the Pros and Cons of Express Burn:
Pros:
- Able to create both data and playable Blu-ray/DVD/CD.
- The entire burning process is fast.
- Available for both Windows and Mac.
- Stable performance.
Cons:
- Too expensive for burning MKV to Blu-ray disc on Mac.
- Too complicated user interface.
- Lack of video editing features.
- Can’t create chapters.
Part 4: How to Burn MKV to Blu-ray on Mac with iSkysoft?
iSkysoft DVD Creator is another professional Blu-ray burner software tool that is available for both Windows and Mac users to convert and burn MKV files to Blu-ray disc on Mac or Windows computers. It could burn video to DVD or Blu-ray disc, folder, and/or ISO image file, as well as burn photos to DVD/Blu-ray content. It provides internal video editor, menu designer, chapter creator to let you get better Blu-ray burning experience.
You could follow the below guide to learn how to burn MKV to Blu-ray on Mac.
Step 1: Get preparation: insert blank Blu-ray disc into the Blu-ray drive, connect Blu-ray drive to computer, get source MKV files ready, and download and install iSkysoft DVD Creator on your Mac computer.
Step 2: Kick off iSkysoft DVD Creator and then click the “Create a Blu-ray disc” option.
Step 3: Then, click the “+” button to browse and load source MKV file from Mac computer.
Step 4: After loading source MKV files, you could click the “Edit” button to edit loaded MKV files like adding effect or watermark.
Step 5: You could click on the “Menu” tab to select a preset disc menu, or edit disc menu via the internal disc menu creator.
Step 6: Then, click the “Burn” tab to complete more Burn Settings, including: Burn to disc, Disc Label, Burner (the Blu-ray drive connected to your Mac computer), etc.
Step 7: After completing these settings, click the red “Burn” button to start burning MKV file to Blu-ray disc on Mac.
You will be able to burn MKV to Blu-ray on Mac with this iSkysoft Mac Blu-ray burner. The below are the Pros and Cons of this Blu-ray burner for Mac:
Pros:
- Easy to use interface.
- Burn video to DVD/Blu-ray disc, folder, ISO at will.
- Burn pictures to Blu-ray/DVD content.
- Many customization features: internal video editor, disc menu editor, etc.
Cons:
- The video editing features are very basic.
- Program is not stable enough.
- High cost.
Part 5: FAQs
1. How long does it take to burn Blu-ray?
This actually depends on multiple things: source file size, output Blu-ray type (BD50 or BD25), output Blu-ray bit rate, Blu-ray burner software performance, computer configuration, etc. Generally speaking, the larger the source files are, the longer the burning could be.
2. Can I burn 3D Blu-ray disc?
Yes, most Blu-ray burner software tools like Leawo Blu-ray Creator allow you to add 3D movie effect for 3D Blu-ray burning. You just need to use a Blu-ray burner software program that supports 2D to 3D converter.
3. Can I burn ISO file to Blu-ray disc directly?
Yes, you can. By using professional Blu-ray creator software such as Leawo Blu-ray Creator, you could directly burn ISO file to Blu-ray disc in simple clicks.


