If you’ve downloaded an ISO, and you want to burn it to DVD, so you can play it on your DVD player? In this case, you’ll need ISO burner software to burn the ISO file contents to a blank DVD. ISO files hold the full tree structure and information of a DVD or CD, burn it and you are ready to watch the movie or work with the program as with a normal DVD.
On the positive side, ISO burners are free and uncomplicated to use and therefore the whole process is simple. You can even rip your own custom DVDs with downloaded ISO images in no time so that you can watch them on your DVD player. Okay, let’s discover how to easily burn ISO files to DVD using ISO Burner.
OutlineCLOSE
Part 1: Benefits & Tips for Burning ISO Files to DVD
The biggest advantage of burning ISO files to DVD, you can then watch them on more than one device. ISO files are essentially burned DVDs or CDs digitized into image file format in your computer. If you burn the ISO to a physical disc, you are now able to play the disc on any conventional DVD player, game console, or any other device that plays disc content.
It is possible to watch ISO movies on a TV or Blu-ray player in the living room as an alternative to the computer screen. You can also load a burned ISO file and play it through the console without having to run the internet to download it.
Another benefit is you can back up favourite films, videos, or family films you want to store for a very long time. Once burned you will have a clean, archive copy of everything in the ISO file as a permanent backup on the burned disc. It works like the original disc.
Tips for burning ISO to DVD:
- Use good-quality blank DVD-R or DVD+R discs that can play video. Don’t use cheaper DVD-RWs.
- Be sure your ISO burner software is 100% compatible with your DVD drive model for best results.
- Check the ISO file before burning it to make sure it is intact and the right size.
- Burn as slow as your drive allows (e.g., 8x) for higher success rates.
- Finalize the disc after burning to finalize the file structure and make it readable in regular DVD players.
- Use covers for Discs so they don’t scratch or bend.
Part 2: How to Burn ISO to DVD with Leawo Blu-ray Burner?
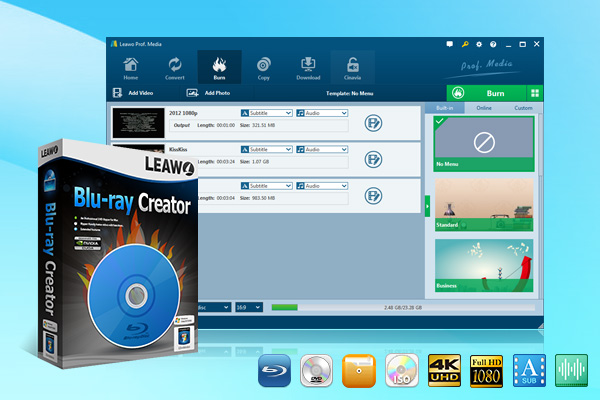
Leawo Blu-ray Creator is a quick and simple video and image burn program for converting various video and photo formats like ISO files to Blu-ray or DVDs. Its intuitive interface and 40+ disc menu templates make it easy to turn your Blu-ray or DVD movie into a high-quality product in no time. Below are the main capabilities of the Leawo Blu-ray Burner:
- Burn movies and pictures in 180+ formats to Blu-ray or DVD.
- Copy Blu-ray/DVD of all kinds of media such as camcorder videos, phone videos, online videos downloaded and screen recordings.
- Burn to Blu-ray disc, DVD, folder or ISO image file.
- Built-in media player to play 4K videos up to 4K resolution without compromising the quality.
- Instant previewer for video editing, 3D movie application, photo slideshow editing, disc menu selecting and designing.
- Snapshot tool for taking screenshots of video when playing.
- Batch burning to import and burn several media files at a time.

-
Leawo Blu-ray Creator
– Burn videos and photos to Blu-ray/DVD in 180+ formats.
– Burn multiple media files to one Blu-ray/DVD file in batch with 100% quality.
– Provide an internal video editor for personalized Blu-ray/DVD content.
– Offer 40+ selectable disc menu templates.
Let’s now see how to burn an ISO file on a Blu-ray disc with Leawo Blu-ray Creator:
Step 1: Add source ISO file
Click the “Add File” button in Leawo Blu-ray Creator first. Click “Add ISO File” and choose the ISO file you wish to burn. After you have chosen the file Leawo will load it and you can proceed to the next step.
Step 2: Burn the ISO file
Slip a new Blu-ray disc into your drive. After adding the ISO, Leawo will show you where to save it. Select your Blu-ray drive from the drop-down. You can name the disc too. Press the big “Burn” button and Leawo will burn the ISO file straight to the disc. Relax and watch it do its work!
Leawo Blu-ray Creator can directly burn ISO to Blu-ray discs which can directly realize creating your own custom Blu-ray discs quickly and easily.
Part 3: How to Burn ISO to DVD with ISO Workshop?
ISO Workshop is a flexible Windows desktop program that makes working with ISO image files from start to finish much easier. It is simple to use and has a simple graphical user interface, allowing you to easily create, extract, and manipulate ISO images, and make disc burning and copying operations of any kind. Burning an ISO file to DVD on Windows via ISO Workshop is in principle a very simple task. Let’s go through the steps:
Step 1: Insert a blank DVD into your DVD recorder.
Step 2: Launch ISO Workshop on a Windows computer.
Step 3: Navigate to the “Data/Copy” section and click “Burn ISO”.
Step 4: In the “Next Window click ‘Browse’ to open the ISO image file to be burned. Click on the ISO file location, select it and click “Open”.
Step 5: After you’ve chosen the ISO file, hit “Start recording” to start burning it.
If you want to burn the ISO file on multiple discs, insert the next blank DVD when asked and ISO Workshop will start a new burn. Press “Cancel” to cancel the recording. Alternatively, an ISO file can be burned on a DVD directly, by right-clicking or holding down the mouse button for the duration of one second, choosing “Burn disc image” from the context menu and selecting the appropriate DVD burner from the proposed list.
Part 4: How to Burn ISO to DVD with Free ISO Burner?
Using the built-in Windows Disc Image Burner Tool is not possible in Windows Vista or Windows XP, so a 3rd party tool must be employed to burn ISO images to the disc. One free, convenient, ISO Burner.
Following are the steps to burn an ISO file to a DVD with a Free ISO Burner:
Step 1: Download and install the Free ISO Burner software on the user’s PC.
Step 2: Insert a blank DVD into your computer’s optical drive.
Step 3: Free the ISO burner, “Open” on the left side of the grey box.
Step 4: Double-click a file, select the ISO file you want to burn to DVD and click “Open” to agree.
Step 5: Make sure the drive you can see underDrive” is the one you inserted a blank DVD in during step 2.
Step 6: Unless you need to troubleshoot a problem, you can skip the customizations in the “Options” area. At most, you may want to configure a volume label for the new disc, but it’s not required.
Step 7: Press the “Burn” button to burn ISO. This might take a few seconds to a few minutes depending on your ISO file size and how fast your disc burner is.
When the burning is done, the DVD will pop out of the drive automatically. You can then unmount the disc and quit the Free ISO Burner program. Free ISO Burner is not an installed application, so you don’t have to download it, which is why Free ISO Burner can be used easily and portable to burn ISO files on DVD on Windows Vista and XP.
Part 5: FAQ
Q. What is an ISO file, and why is it used for burning DVDs?
ISO files are complete image files of a disc, carrying all data and media format of the original storage. These work for creating as accurately as possible duplicates of CDs, DVDs or Blu-ray disks.
Q. Can I burn ISO files to any type of DVD?
Yes, the Leawo Blu-ray Creator can burn DVDs-R, DVDs+R, DVDs-RW and DVDs+RW discs.
Q. How long does it take to burn an ISO file to a DVD?
It depends on the number of files, the speed of the DVD drive, the type of disc, and so on. On average, it takes between minutes and hours.
Q. Why won’t my burned DVD play on my DVD player?
Possibly, this is due to a technical mismatch between the DVD specification and the player. Make sure to choose the right burning mode (i.e., Continuous (DVD-Video) and finish the disc while burning.
Q. Do I need special software to burn ISO files to DVD?
Sure, you will require an ISO burning program such as Leawo Blu-ray burner, ISOburn, BurnAware or ISO Workshop. Such tools are built to process ISO files and burn them to discs.


