Apple released the newest Mac computer, MacBook Pro, for all Apple fans. And many people might have switched from old Mac to this new Mac computer. And if you are also iPhone users, you need to sync iPhone to your new Mac. But please note that you are only allowed to transfer the purchased files from iPhone to new Mac. How about the non-purchased files? The third-party iPhone transfer software may help you. In this post, we are going to show you how to sync iPhone to new Mac with/without iTunes.
Part 1. How to Sync iPhone to New Mac with iTunes
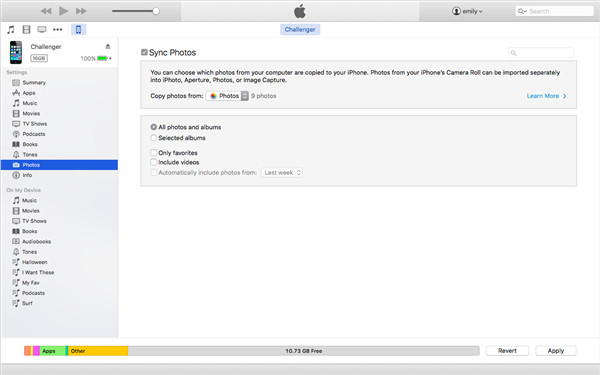
Step 1. Connect Your iPhone to new Mac with USB cable. iTunes should launch automatically.
Step 2. Click on the iPhone image and name in the left hand drawer in the program. The phone’s information should show up on the right.
Step 3. Click on the tabs in the window and choose what information you would like to sync. You can sync photos, music, contacts, applications and ringtones.
Step 4. Press “Apply” in the lower-right corner of the screen to sync the iPhone with the computer. You will be asked in your first sync whether you wish to merge data between computer and phone, replace the data on the phone, or replace data on the computer. In the case of a new Macbook you will likely want to replace data on the computer, which backs up your iPhone data on your new computer.

Part 2. How to Sync iPhone to New Mac with iTunes Alternative
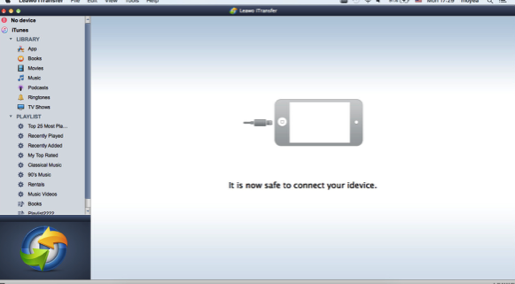
Please note that you are only allowed to sync purchased items from iPhone to iTunes, so it is not right if you have any non-purchased items in your iPhone. When you restore your iPhone, the non-purchased items will be erased without any doubts. In order to sync all your data from iPhone to new Mac computer without any data loss during the transfer process, you can take advantage of the third-party software to solve the problem. Leawo iTransfer for Mac is a powerful transfer tool, and it can be used for transferring files among iOS devices, iTunes and PCs. This software can transfer apps, music, movies, ringtones, ebooks, photos and Camera Roll files and so on. So I can take advantage of this software to sync iPhone with new Mac computer without losing data. The following guidance is about how to sync iPhone to new Mac computer with Leawo iTransfer for Mac, you can free download this software and try it yourself:
Step 1. Launch Leawo iTransfer for Mac after installing it on your new Mac computer. When the software indicates that you can connect your iOS device, plug your iPhone to Mac via the USB cable. The software will automatically detect your iPhone and show the Libraries on the left sidebar. The files will show on the right part of the window after you choose a library.
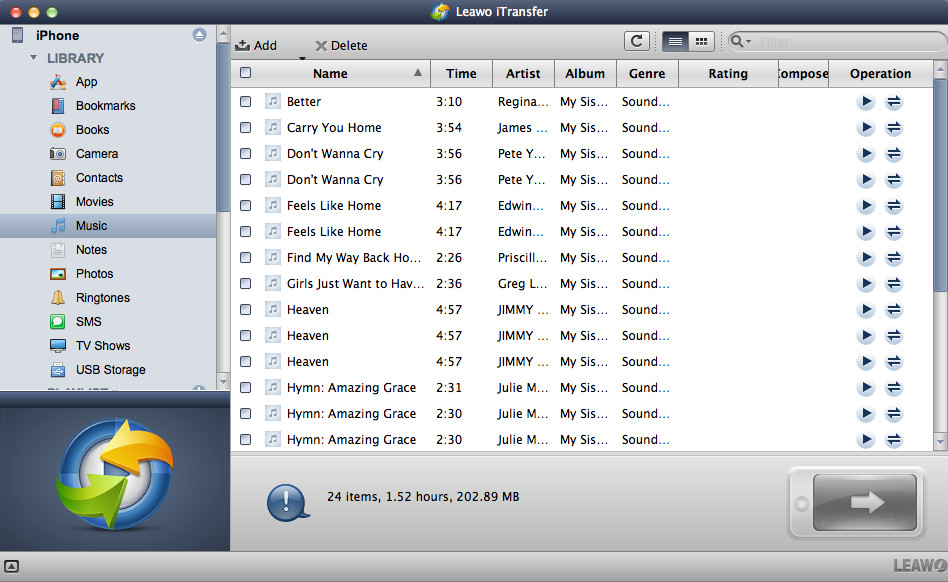
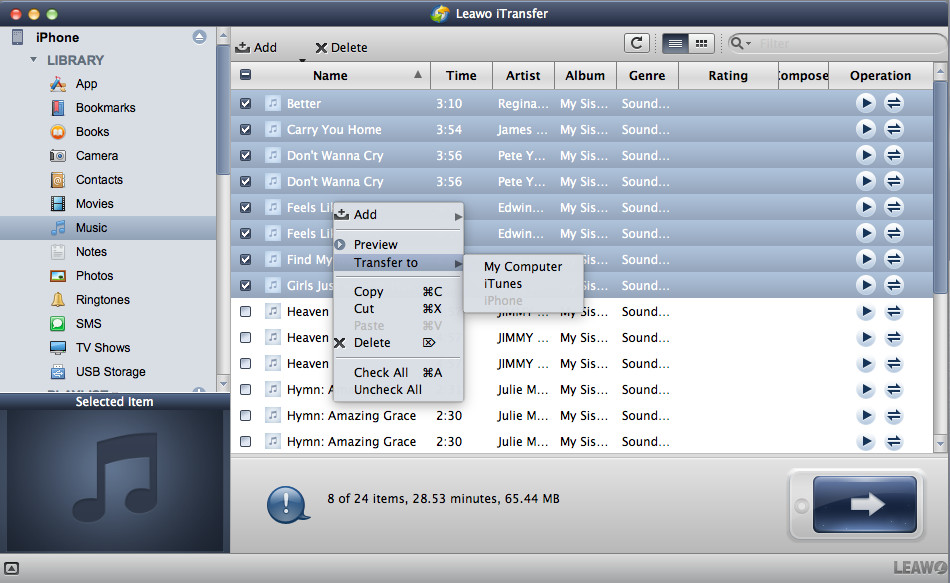
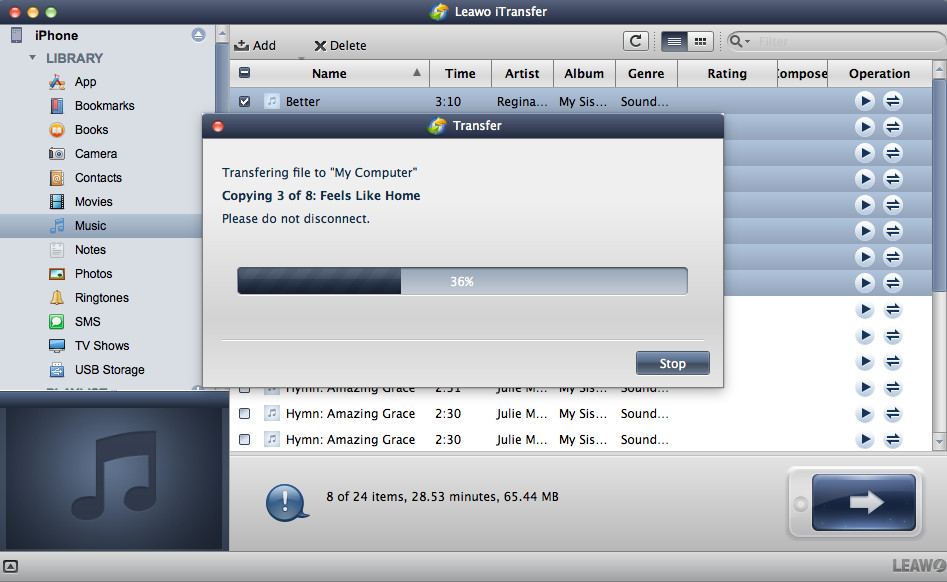
Step 2. Choose a Library and the all the files in the library will show on the right part of the software (Set the Music Library as an example). Click the transfer button (the right arrow in a dark-blue rectangle) at the right bottom to transfer all the files to computer. Or you can hold Ctrl key and click to choose certain files, and then right click the chosen files and choose “Transfer to > My Computer”.
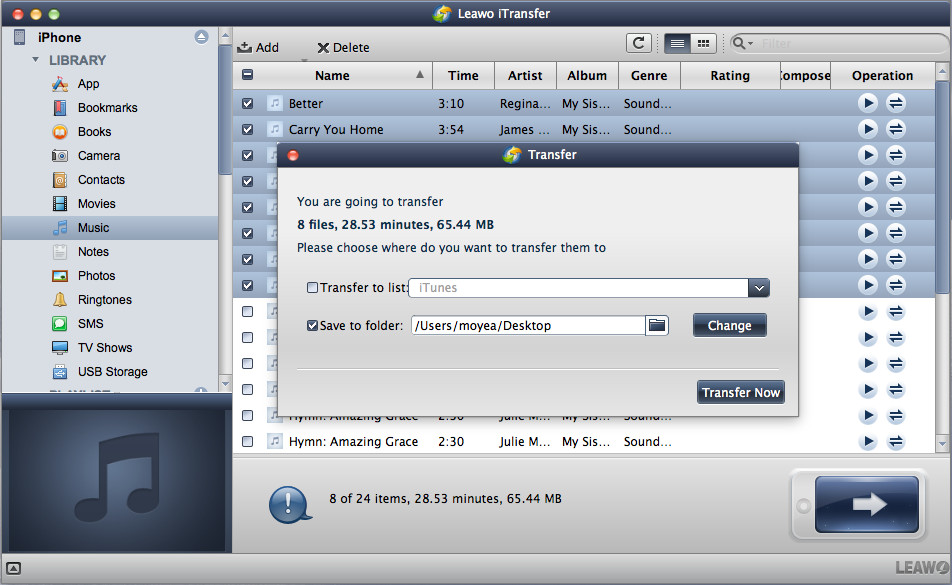
Step 3. After choosing files, a dialog of transfer settings comes out. In this dialog, you are able to check “Transfer to List” and “Save to Folder”. Checking “Transfer to List” can make sure your files be transferred to iTunes; Check “Save to Folder” and click “Change” to choose a target folder to save the transferred files. If you are using a new computer and the iTunes is newly installed, I suggest you check both options. After choosing target folder, click “Transfer Now” to start to sync iPhone to new computer.
Step 4. When the transfer begins, you will see a dialog of transfer process. A progress bar in the dialog will show you the percentage of the syncing process. When the syncing process is finished, you will find all the files in your target folder and iTunes.
Leawo iTransfer provides solutions for the Apple product users who are coming up with transfer problems and makes the iPod, iPad and iPhone data transfers extremely easy. Therefore, if you want to get rid of iTunes synchronization, you can try to use the software.


